MARBLE FLOORING & WALL CLADDING IN DUBAI

Marble Flooring & Wall Cladding in Dubai

Set the layout before the stone sets the room.

For new marble floors, wall cladding, feature walls, wet areas and stair finishes where alignment, substrate condition, joint planning and fixing method matter as much as the stone itself. We assess the surface, set out the pattern and choose the fixing route before installation starts so the finished work reads as one deliberate composition rather than a collection of individually fitted slabs.

Layout Before AdhesiveVein direction, visible cuts, joint lines and focal areas are planned before the first permanent fix.
Substrate CheckedLevels, flatness, moisture-sensitive conditions and access are reviewed before the fixing method is selected.
Floor, Wall & Stair ScopeOne installation route does not fit every surface; floor beds, wall panels, wet areas and stair components are assessed separately.
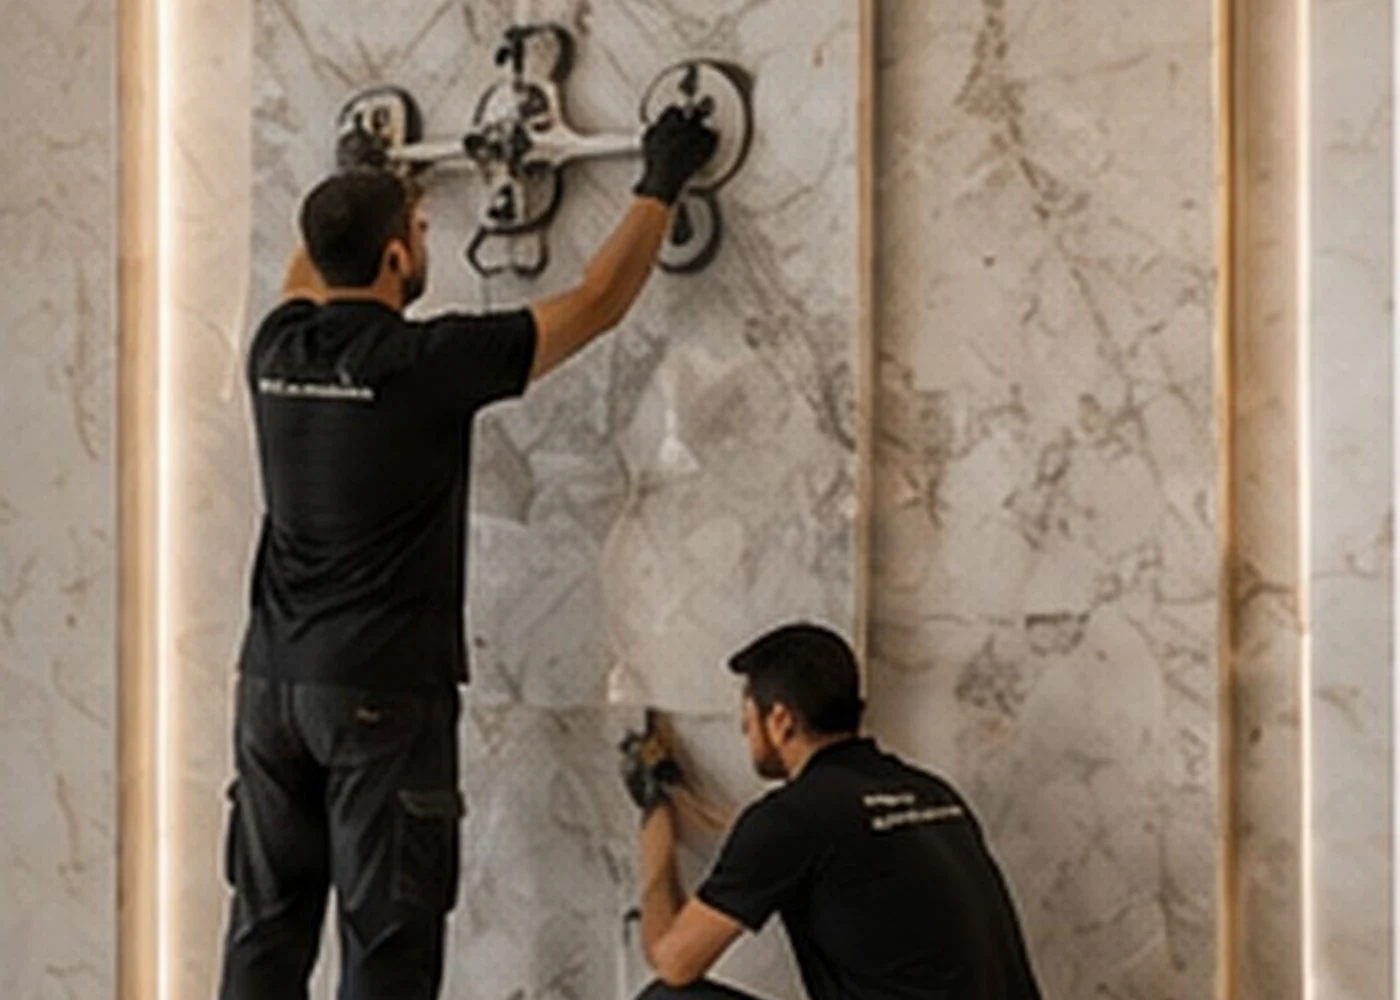
Marble installers positioning a large-format natural marble wall panel with professional suction lifting equipment in Dubai

IS THIS THE RIGHT INSTALLATION SERVICE?

Choose flooring and cladding when the project needs new stone fixed into the building — not just an existing surface repaired.

This service is for installing marble as a finished architectural surface. It covers setting-out, cutting coordination, fixing, alignment, joints and handover. If the marble is already installed and the issue is dullness, dirt or damage, polishing, cleaning or restoration is usually the more direct route.

FLOORING & CLADDING IS USUALLY THE RIGHT ROUTE WHEN

  • New marble slabs, tiles, treads or panels need to be fixed to floors, walls, stairs or wet-area substrates.
  • The project needs book-matched or vein-aligned wall panels where visual layout has to be decided before cutting and fixing.
  • Existing finishes are being replaced and the substrate must be prepared for a new marble installation.
  • A renovation needs coordinated skirting, thresholds, stairs, wall cladding or transitions rather than isolated surface polishing.

A DIFFERENT SERVICE SHOULD BE ASSESSED FIRST WHEN

  • The marble is already securely installed and only looks dull, hazy or lightly scratched — polishing may be enough.
  • The issue is grease, residue or dirty joints without installation defects — cleaning should be assessed first.
  • Installed marble has cracks, chips or failed joints but does not require replacement — restoration may be the better route.
  • Large-format wall panels require brackets, anchors or rails rather than adhesive fixing — use the Mechanical Fixing / Installation service.
CHECK MECHANICAL FIXING

WHAT GOOD INSTALLATION PREVENTS

The layout and fixing decisions that determine whether marble still looks right after handover.

Installation quality is not judged only by whether the stone stays in place. Joint consistency, edge alignment, lippage, vein flow, finished levels and interface details all affect how the completed surface reads under real lighting.

01

Poor joint alignment

Unplanned joint lines can interrupt doorways, focal walls, stair geometry or large open floors even when individual pieces are technically fixed.

Target: set out visible lines before installation and keep repeatable joint widths.
02

Lippage between adjacent pieces

Uneven substrate, inconsistent adhesive beds or rushed setting can leave edges at different heights that catch light and foot traffic.

Target: control levels and flatness before the fixing material cures.
03

Broken vein flow on feature surfaces

Book-matched or directional marble can lose its design intent if pieces are rotated, cut or installed without a mapped sequence.

Target: preserve the intended visual flow across the installation.
04

Weak perimeter and transition details

Door thresholds, skirting lines, corners and interfaces with metal, timber or tile often expose poor planning more quickly than the open field.

Target: resolve interfaces before final cuts are made.
05

Wet-area fixing mistakes

Bathrooms and other wet zones combine falls, waterproofed substrates, drains, penetrations and edge sealing that cannot be treated like a dry lobby floor.

Target: coordinate stone layout with the wet-area build-up and drainage geometry.
06

Stair inconsistency

Treads, risers and nosings become visually obvious when dimensions, overhangs or grain direction vary from one step to the next.

Target: repeat the stair profile and finish sequence consistently from bottom to top.

WHAT HAPPENS ON SITE

Measure, set out, dry-check, fix, then inspect — in that order.

The exact installation method changes with slab size, substrate, location and stone format. The sequence below keeps the visible design and the technical fixing decisions connected rather than treating them as separate jobs.

  1. 01

    Survey levels, substrate and site interfaces

    We measure the working area, check levels and flatness, review substrate condition and note drains, openings, skirting, thresholds, corners and adjacent finishes that affect the installation.

  2. 02

    Plan the marble layout and visible cuts

    Slab direction, grain or vein flow, panel sequence, joint locations and focal areas are mapped so the most visible surfaces are not decided piece-by-piece during fixing.

  3. 03

    Dry-check key pieces and prepare the fixing bed

    Critical pieces, book-matched panels, stair components and transitions are checked before permanent fixing. The substrate and fixing bed are then prepared for the selected installation system.

  4. 04

    Fix, align and control joints while the system is workable

    Stone is positioned using appropriate handling and levelling methods, with continuous checks for line, level, lippage, joint width and edge continuity before the fixing system sets.

  5. 05

    Finish joints, protect the work and complete handover checks

    Joints, sealant interfaces and finished edges are completed within scope, then the installation is checked for alignment, cleanliness and visible damage before protection or handover.

Professional installers working with large marble wall panels during installation
Large-format work is planned around panel handling, substrate condition, joints, access and the fixing method before permanent installation.

FLOORING & WALL CLADDING RATES

Starting rates change with the surface, format and level of installation control required.

A large open villa floor, a book-matched wall and a complete staircase are not equivalent installation scopes. These rates give a planning point while the final quotation follows measured quantities, material format and fixing requirements.

Service scopeFromUnitWhat it covers
Marble Floor InstallationAED 69/m²Standard floor installation for prepared suitable areas
Villa / Large Area FixingAED 41/m²Large continuous areas with efficient repeated layout
Apartment Marble InstallationAED 45/m²Standard apartment work with normal room transitions
Marble Wall CladdingAED 96/m²Interior wall cladding with alignment and joint control
Book-Matched Feature WallAED 102/m²Matched panel sequence, layout and feature-wall alignment
Bathroom Floor & WallAED 129/m²Wet-area installation with falls, penetrations and detailed cuts
Marble Staircase (Complete)AED 315/stepTread, riser and nosing installation as a complete stair finish
Basic Stair InstallationAED 90/stepSimpler pre-prepared stair component installation
Marble SkirtingAED 54/lmStandard skirting cuts, joints and mitred corner detailing

Marble Floor Installation

AED 69 /m²

Standard floor installation for prepared suitable areas

Villa / Large Area Fixing

AED 41 /m²

Large continuous areas with efficient repeated layout

Apartment Marble Installation

AED 45 /m²

Standard apartment work with normal room transitions

Marble Wall Cladding

AED 96 /m²

Interior wall cladding with alignment and joint control

Book-Matched Feature Wall

AED 102 /m²

Matched panel sequence, layout and feature-wall alignment

Bathroom Floor & Wall

AED 129 /m²

Wet-area installation with falls, penetrations and detailed cuts

Marble Staircase (Complete)

AED 315 /step

Tread, riser and nosing installation as a complete stair finish

Basic Stair Installation

AED 90 /step

Simpler pre-prepared stair component installation

Marble Skirting

AED 54 /lm

Standard skirting cuts, joints and mitred corner detailing

Indicative starting rates only. Final pricing depends on marble/stone format, substrate condition, dimensions, fixing method, access, cutting, joint layout, quantity and project requirements. Stone supply, structural work, waterproofing and mechanical support systems are excluded unless specifically stated.

Finished luxury marble floor and staircase with aligned large-format stone surfaces

LAYOUT & FINISH OPTIONS

The same marble can look completely different depending on how it is laid out and detailed.

The installation should support the design intent of the stone. We plan orientation, joint rhythm and edge treatment around the actual space instead of treating every slab as interchangeable.

01

Large-format floor layout

For open spaces where fewer joints and consistent slab direction are central to the finished appearance.

02

Book-matched wall composition

For feature walls where adjacent panels are sequenced to create a mirrored or continuous vein pattern.

03

Stair tread, riser & nosing set

For staircases that need repeatable geometry, edge profile and consistent visual direction across every step.

04

Wet-area floor & wall integration

For bathrooms and similar spaces where wall layout, floor falls, drains, niches and penetrations must be coordinated together.

WHERE WE INSTALL MARBLE

Common flooring and cladding applications across Dubai properties.

Each application changes the fixing method, handling, detailing and tolerance requirements, even when the same marble is used.

Villa & apartment floorsLobby & reception floorsFeature walls & book-matched panelsBathrooms & wet-area wallsStair treads, risers & landingsSkirting, thresholds & architectural transitions

MATERIAL & FORMAT SUITABILITY

Fixing method follows the stone, size and location — not just the room name.

Natural stone density, thickness, format and moisture sensitivity all influence handling and fixing. Large-format panels also introduce weight and restraint requirements that smaller floor tiles may not have.

Natural MarblePrimary application for floors, walls and stairs; method depends on thickness, format and substrate.
Granite & QuartziteHeavier/harder stone may change cutting, handling and fixing requirements.
Travertine & LimestonePorosity, voids and edge strength are reviewed before installation and grouting.
Large-Format Porcelain / Sintered StoneRequires format-specific handling and substrate control; mechanical support may be needed on some vertical applications.
ADHESIVE FIXING OR MECHANICAL FIXING?

Choose the installation system by panel size, weight, substrate and risk — not by preference alone.

Most standard floors and many internal wall applications use adhesive or mortar-based fixing. Larger/heavier vertical panels or certain façade and high-risk applications may require mechanical restraint.

STANDARD FLOOR / INTERNAL WALL

Flooring & Wall Cladding

Use this route for standard marble floors, stairs and suitable internal wall cladding where the substrate and panel format suit adhesive or mortar fixing.Do not assume adhesive fixing is appropriate for every large or heavy vertical panel.Current service

LARGE / HEAVY VERTICAL PANELS

Mechanical Fixing / Installation

Use mechanical fixing when anchors, brackets, rails or other restraint systems are needed to support the stone independently of adhesive bonding.Mechanical systems are usually unnecessary complexity for ordinary prepared internal floor installation.View mechanical fixing →

EXISTING INSTALLED STONE

Marble Restoration

Use restoration when the existing marble is already installed and the problem is cracks, chips, joints or deeper surface damage rather than a need for new installation.Restoration does not replace the need for correct substrate or fixing work when slabs are loose or moving.View restoration →

MARBLE INSTALLATION FAQ

Questions that affect layout, fixing method and final cost.

The right answer depends on the surface and format, so these FAQs focus on the decisions that change the installation scope.

01How much does marble floor installation cost in Dubai?

Our standard planning rate for marble floor installation starts from AED 69/m². Large-area and apartment scopes can have different starting rates, while wall cladding, wet areas, stairs, skirting and book-matched feature work are priced separately because they involve different handling, layout and detailing requirements.

02Can you install marble over an existing floor?

Sometimes, but it should not be assumed. Existing finishes, levels, movement, adhesion, door clearances and the added build-up all need review. Where the existing surface is unsuitable, removal or preparation may be required before the new marble is fixed.

03What is the difference between marble wall cladding and mechanical fixing?

Standard internal wall cladding may use a suitable adhesive or mortar system when the substrate, panel format and height allow it. Mechanical fixing uses anchors, brackets, rails or other restraints to physically support the stone and is considered for larger, heavier or higher-risk vertical applications.

04Do you install book-matched marble feature walls?

Yes. Book-matched work is planned as a panel sequence rather than as independent pieces. The visible vein flow, joint location, panel orientation, cut sizes and site dimensions are reviewed before permanent fixing so the intended pattern is maintained.

05Do bathroom marble floors and walls cost more than open floor areas?

They can, because bathrooms often require more cuts, corners, penetrations, niches, drains, falls and interface details in a much smaller area. The rate reflects detailing and working complexity rather than square metres alone.

06Do your installation rates include the marble material?

Not unless specifically stated in the written quotation. The published rates are indicative installation planning rates. Stone supply, special cutting, mechanical support systems, waterproofing, structural work and other materials are confirmed separately according to the project.

07How do you control lippage between marble pieces?

The substrate condition and layout are checked first, then stone is set and adjusted while the fixing bed remains workable. Levelling aids may be used where appropriate, but they do not replace the need for a flat substrate, consistent bed thickness and continuous line/level checks.

PLANNING A FLOOR, WALL OR STAIR INSTALLATION?

Send the drawings, dimensions or site photos before the marble is cut.

Share the location, approximate area, stone format and any drawings or reference images. We can identify the likely fixing route and the details that need checking before site work starts.